
Build Your Own Putting Green - Instructions
Step 1 - Build a Frame with a Center Support
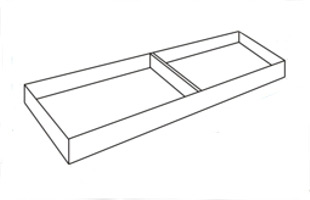 |
Start by building a frame like the one pictured.
The sides of the frame have to be at least 4.5" high to
accomodate the puttacup that will be inserted. Also, make sure you included the middle support beam. You will be standing on this to putt. This beam will support your body weight. To keep the sides together, it would be wise to screw metal brackets into each inside corner of the frame. |
Step 2 - Put the Top On
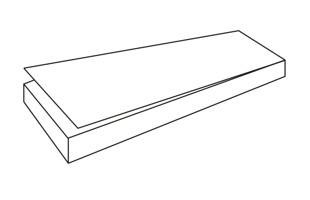 |
Once you have the frame put together, it's time to nail
the top on. The top should be flush to the edges of
the frame. If you decide to make your indoor putting green longer than 8 feet long you can do so. Simply, make the frame longer then nail an additional top portion onto it. Please keep in mind that if you may the green really long, you may need to add a second support beam in the middle to support the weight of someone walking back and forth on the surface. |
Step 3 - Cut the Hole in Top
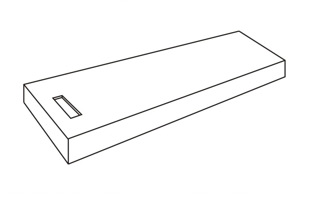 |
Now that you have the basic indoor putting surface
together, it's time to cut the hole in the top. This
hole is where you will be inserting the puttacup so it is
vital that you DO NOT cut the hole too big. To get a comfortable fit you should cut a hole that is 4.25" wide by 10" long. This won't be so tight that you cannot get the puttacup out. Finally, I would suggest cutting the hole a few inches from the back railing. This way you won't be using the back railing to bounce the balls into the hole. |
Step 4 - Put Railings On
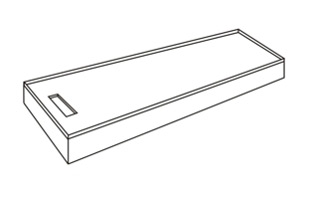 |
Here is where you put the outside railings on.
These railings stop the balls from falling off of your home
putting green. All you need are pieces of molding that
you hammer onto the edges. I would suggest these railing be about 1" high. |
Step 5 - Lay Carpet
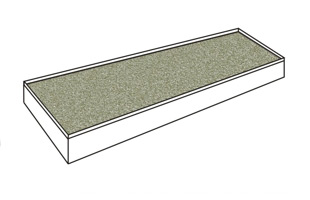 |
Now comes the fun part. Take your indoor / outdoor
carpet or any low pile carpet that would accurately
represent a putting surface and cut it to the exact inner
dimensions of the top surface of you home putting green.
Once cut, I would suggest gluing the carpet in position. Your typical "Elmer's Wood Glue" should do the trick. |
Step 6 - Cut Hole in Carpet
 |
Now that your carpet is securely glued to the top
surface of your home putting green, it's time to cut the
hole for the puttacup. Start by feeling around in the area of the hole that you cut earlier. Make an incision with an exacto knife in the center of the hole. Once the center hole is cut, gradually make your way to the edges until you have cut the carpet to the same size as the hole in the top surface. |
Step 7 - Insert puttacup and Start Practicing
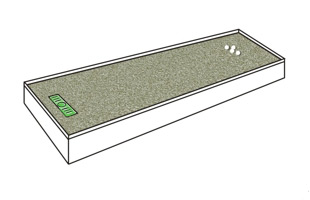 |
Now, all you have to do is insert the puttacup into place and your indoor putting green is ready to go. |
Materials Needed:
- 4x8 sheet of plywood for the top surface
- 6' x 8' x 3/4" to make sides and ends of platform as well as the center support beam - more wood needed if you are making a longer platform
- 24 feet of molding to make railings on top of platform (outside edges) - more wood needed if you are making a longer or wider platform
- 32 square feet of low pile or indoor outdoor carpet
- glue to hold down carpet
- 4 metal brackets to hold corners frame together
- nails
- screws for brackets
Tools Needed:
- hammer
- screw driver
- tape measure
- jigsaw
- exacto knife